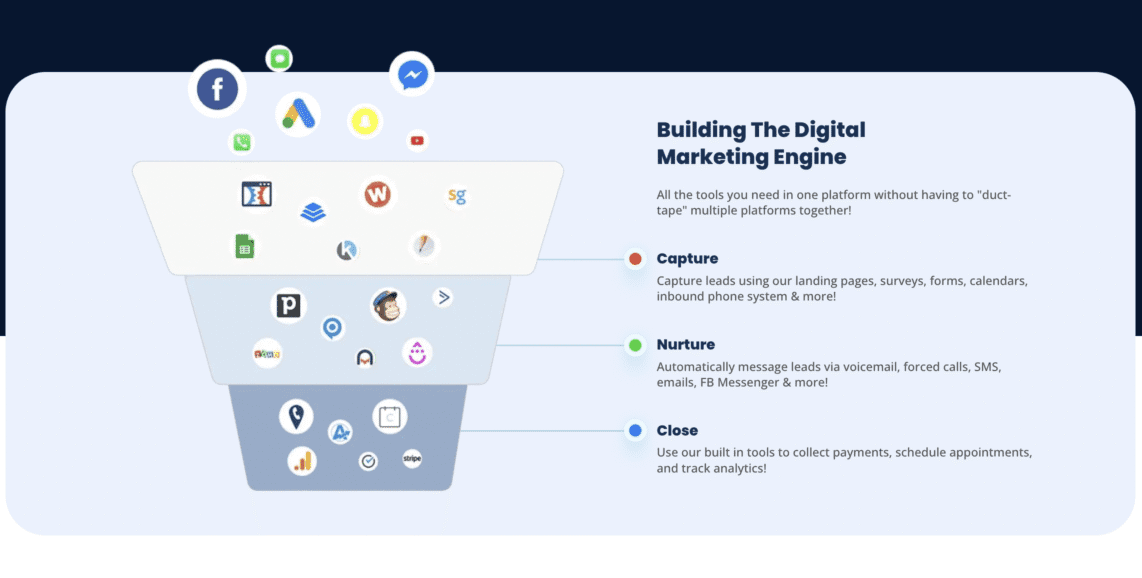
HighLevel is one of the most powerful all-in-one platforms for agencies and small businesses. It combines funnel building, email marketing, SMS automation, pipeline tracking and CRM – all under one roof. But if you’re not setting up your CRM workflow correctly, you’re probably leaving money on the table.
In this guide, we’ll walk through how to build a solid, automated CRM workflow inside GoHighLevel that helps you capture leads, follow up fast and close more deals without extra busywork.
What Is a CRM Workflow?
A CRM workflow is the automated process you create to manage leads as they move through different stages – from new lead to customer. It’s not just about storing contact info. A good workflow tells your system what to do next based on what a lead does (or doesn’t do).
With GoHighLevel, your CRM is fully customizable, and you can automate actions like:
- Sending a text when a new lead opts in
- Assigning a task to a sales rep
- Moving a contact from “Interested” to “Booked Call”
- Notifying your team if a lead goes cold
- Triggering a review request after purchase

Let’s break down the setup.
Step 1: Build Your Pipeline
Before you build automations, set up your Pipeline — this is your visual lead flow. In GoHighLevel, go to:
Opportunities → Pipelines → Create New Pipeline
Create the stages that match your business. For example:
- New Lead
- Contacted
- Demo Booked
- Follow-Up Needed
- Won
- Lost

Keep it simple at first. You can always add more stages as your process gets more advanced.
Step 2: Set Up Lead Capture
Decide how leads will enter your system. You can capture leads through:
- Funnels or websites built in GoHighLevel
- Facebook Lead Ads synced to GoHighLevel
- Zapier integrations with 3rd party tools
- Manual entry after a call or meeting
Make sure every new lead gets automatically added to your CRM and tagged with relevant details like:
- Source (e.g. “Facebook Ad”)
- Campaign (e.g. “Webinar Lead”)
- Funnel step they completed
This tagging will be key for automation later.
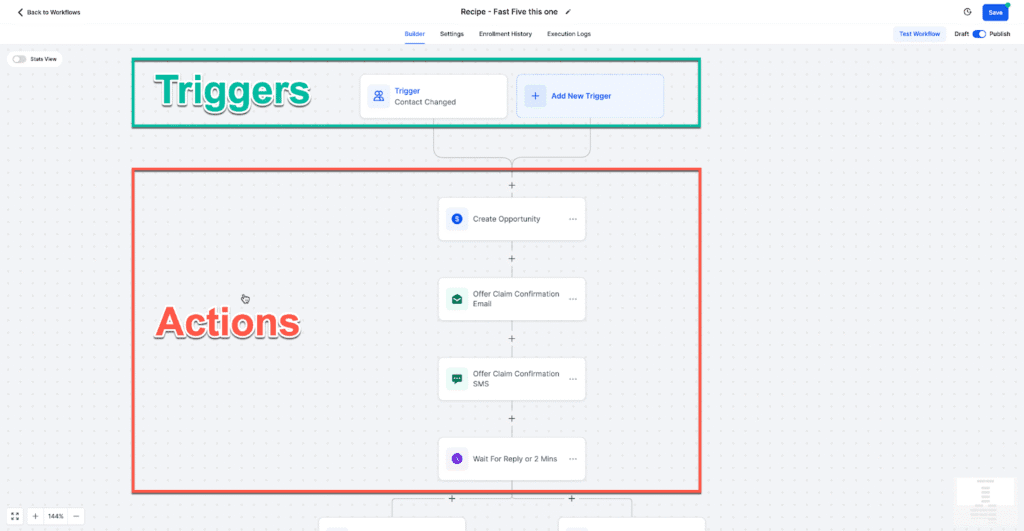
Step 3: Create Your Workflow Automations
Now it’s time to automate. Go to:
Automation → Workflows → Create Workflow
Start with a trigger. Some common examples:
- Form Submitted
- Appointment Booked
- Tag Added
- Pipeline Stage Changed
Then add your steps. You can:
- Send an email or text message
- Assign to a team member
- Create a task or note
- Wait for a specific amount of time
- Move the contact to another pipeline stage
Here’s a simple example for a new lead:
- Trigger: Form Submitted
- Send Intro Email
- Wait 5 minutes
- Send SMS with call scheduling link
- Wait 2 days
- If no appointment booked → notify sales team
You can also split flows using conditional logic (if/else), track email/SMS engagement, and trigger new workflows based on behavior.
Step 4: Set Up Notifications and Internal Alerts
Automations aren’t just for customers. You can also use them to notify your team.
Some useful internal alerts:
- Slack or email alert when a high-quality lead comes in
- Task assignment if no contact has been made in 2 days
- Notification when a proposal is opened or clicked
This keeps your pipeline from going cold and removes the need for manual follow-up reminders.
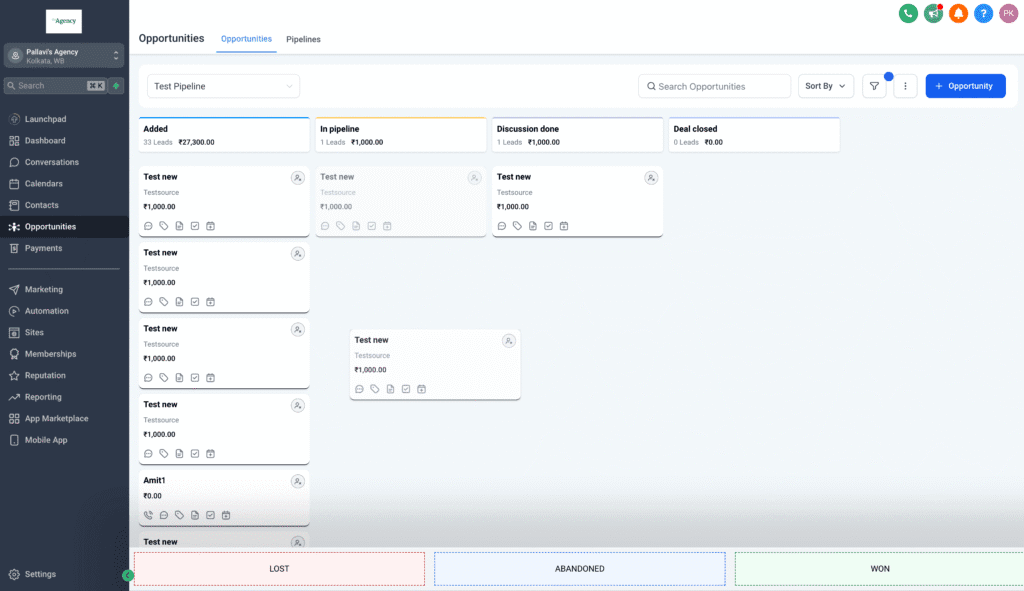
Step 5: Track and Optimize With the Opportunities Tab
Your Opportunities tab is the command center for your CRM. It shows who’s where in the pipeline, revenue forecasts, and conversion rates by stage.
Use filters to view:
- Leads by source
- Leads by owner
- Aging leads that haven’t moved in X days
This makes it easy to spot bottlenecks, see which campaigns drive the most revenue and know who needs attention.
Bonus Tips
- Use Tags Wisely: Tag leads based on source, behavior and product interest. You can trigger entire workflows just from tags.
- Automate Missed Call Text Back: If someone calls and you miss it, set up an auto-text like “Sorry we missed your call. Can we text instead?”
- Pipeline for Every Offer: If you sell more than one service or offer, consider separate pipelines so you can track deal flow cleanly.
Final Thoughts
Setting up your CRM workflow in GoHighLevel takes a bit of upfront work, but once it’s done, you’ll spend less time chasing leads and more time closing deals.
The key is building a workflow that mirrors your real sales process – then letting GoHighLevel do the repetitive parts for you. From follow-ups to lead tracking to client onboarding, the system can handle it all once you lay the foundation.
Start small. Automate one part of your workflow at a time. As you get more confident, layer in more complex triggers, segmentation and internal logic.


